Reviewed by Declan Davey (Health Writer) on 15/06/2021
Are you looking for answers on how to make olive oil at home? You’ve come to just the right place!
The health benefits of olive oil make it a favorite among Naturopathy experts. Check out the recipe below for a step-by-step guide to make olive oil with ease.
How to make olive oil at home in 8 simple steps
Ready to enjoy creating your very own olive oil? Of course you are! For this recipe, you will need about 1 kg of olives, which will give you approximately 70 ml of oil.
You can use either green or black olives. Kalamata olives are a popular choice for oil because they usually have more taste, but you can use any type you like. Please avoid using canned olives to make your homemade oil.
Here’s what you’ll need to make the perfect homemade olive oil:
- 1 kg of olives (to produce approximately 70 ml of olive oil)
- A cup of warm water (suitable for drinking)
- A blender or food processor
- A large square of cheesecloth, muslin, or fine linen
- A mesh strainer
- A clear jar or bowl in which to collect and separate the oil
- A long-handled spoon or ladle
- Bottles with lids for storage
STEP 1
The first step to start the process of making olive oil is to wash the olives thoroughly in cool running water. Pick out any stems, twigs, or leaves. You won’t want them in your oil! Leave to dry on a clean surface. The olives do not have to be completely dry before you start.
STEP 2
Next, you will need to remove the olive pits. If you are using a heavy mechanical press to grind the olives, you can leave the pits in. Olive seeds contain a considerable amount of oil but you do not have to use them. If you are using a food processor, remove the pits because they might damage the blades.
STEP 3
Blend the pitted olives to extract the pulp. You might have to carry out this step in several batches if you have a regular-sized blender at home. More powerful food processors will get the job done faster!
STEP 4
Grinding the olives will give you a chunky paste. Run this paste through the blender again. This will break down the larger parts so that the paste is fine and smooth.
STEP 5
Add a quarter cup of warm water at this stage to help to release the oil from the paste. At this point, you should start to see a soft shine developing in the paste. This is the oil!
STEP 6
Now it’s time to strain the paste. Line a large straining vessel with a cheesecloth, muslin, or fine linen cloth. Place a clear glass bowl or jar beneath. Pour the paste into the strainer and allow it to begin to drip into the bowl. Gather up the edges of the cloth into a bundle and squeeze. Squeeze the cloth bundle until you are left with the dry remnants of the paste.
STEP 7
Allow your collection jar to rest for two hours to allow the oil to separate. The oil will form a layer on top of the juice, making it easier to separate when you want to serve up.
STEP 8
Using a long-handled scoop or ladle, siphon off the oil and slowly pour it into a bottle. And that’s it! Congratulations, you’ve just made a bottle of delicious olive oil all by yourself!

TOP TIP: Homemade olive oil has no preservatives so make sure you store it in a cool dry place away from the light. Your bottle will last about 2 years but it’s best to enjoy it before that!
3 healthy ideas on how to use your homemade olive oil
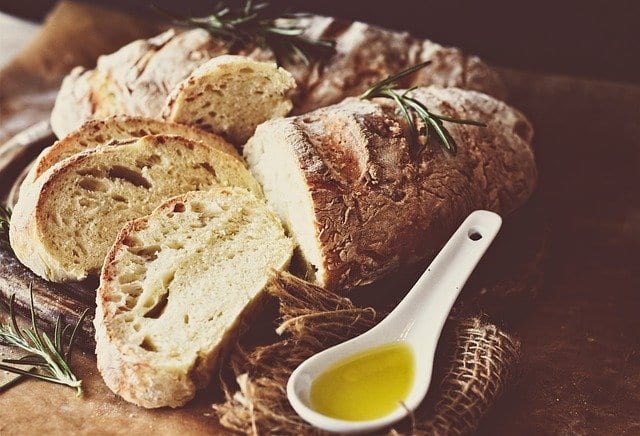
Use raw as a main ingredient: Your cold-pressed olive oil is ideal for drizzling on salads or over pasta, or on top of roast veggies. You could also serve it with a splash of balsamic vinegar as a topping for freshly baked bread or on bruschetta. Yummy!
Use for cooking: Use olive oil to add fats to marinades and sauces. You can also use it for sautéing or roasting meats or vegetables. You can find a host of recipes using olive oil on the consumer websites of the Australia Olive Association.
Use on skin and hair: You can use your homemade olive oil to make a nourishing hot oil treatment for your hair. Or, you can rub it onto your lips or cuticles for a soothing layer of moisture. Olive oil can also be used as a massage oil or as a carrier oil for aromatherapy treatments. Find out more in our blog about aromatherapy here.
Thanks for reading!
If you’ve been looking for how to make olive oil at home, you know that pressing and extracting your own oil gives you complete control over the final product. And hopefully, after trying out the recipe above, you can make a preservative-free, unrefined oil that is delicious and healthy for you and your family!
FAQs About How to Make Olive Oil at Home
Why is making homemade olive oil a good idea?
Olive oil has a wide range of health benefits and is easy to add to your everyday diet, so it’s a great idea to make your own. In its natural form, olive oil is full of healthy fats (which are nourishing for your hair and skin) and it’s packed with antioxidants. According to the 400-year-old field of Naturopathy, olive oil is thought to be able to help prevent the risk of heart disease, stroke, cancer, and diabetes, amongst other diseases.
How is olive oil extracted?
Extracting oil from olives follows a basic process of grinding, pressing, and separating. The olives are ground into a paste which is then pressed to extract a fine oily liquid. Finally, the liquid is allowed to settle and separate into layers, with the denser oil rising to the top. This oil is then decanted into a bottle for use.
What are the key uses of olive oil?
Olive oil is also known as “liquid gold” thanks to its incredible benefits. Whether you use it in your food or apply it to your skin and hair, it is a great option to include in your wellbeing routine for self-care. The Mediterranean diet – which is known to support heart health – uses olive oil for good monounsaturated fats. Once you learn how to make olive oil at home, there are many ways you can enjoy using it.
How long does it take to make olive oil at home?
Although making olive oil at home is healthy (and can be fun for the family too!) it does take some time and effort. If you have more powerful equipment, such as food processors, the process can be faster. But if you’re not planning on making your own oil regularly, or don’t want to clog up your kitchen with fancy equipment, you can certainly make do with what you have at home.
VIEW NEXT:
- The best immune-boosting foods for your diet – Discover what kinds of foods support the immune system, the most essential foods from each group, and which nutrients to keep a lookout for.
- How to eat healthy snacks every day – Review healthy snacks to choose from, homemade recipes you can make today, and options for kids to try too.
- Alkaline foods – Know all about the alkaline diet – To find out how to know if your body is alkaline or acidic, the symptoms of high acidity, and how to consume more alkaline-based foods.
YOU’VE GOT OPTIONS!
-
Download the FREE Avaana app – Search, compare, book and save on health and wellbeing services.
- Book with a Natural Health practitioner today – Enter your location in the search bar to get instant recommendations for a wellbeing boost.
Co-written by Avaana Team & Declan Davey


