Back pain, is the bane of anyone’s existence. You’re not alone, it’s so common in fact that over 40 million Aussies report back pain-related problems. Back pain is often caused by deactivated or weak muscle groups, stiff muscles, hip flexor tightness, postural-related issues, or a combination of all of the above. To help, Avaana has prepared five roller exercises to help ease your muscle pain.
What to remember before you start doing foam roller exercises
- Stay hydrated, drink a glass of water before and after your session, make sure you also hydrate during the session as well.
- Don’t use the foam roller directly on your lower back. For lower back pain, you can focus instead on rolling your glutes, quads, psoas, and hip flexors.
- Don’t try and do everything in one session. Spend about 5-10 minutes focusing on one muscle group, and you’ll reap far more benefits than trying to foam roll your whole body.
- Start with a medium firmness foam roller. If these stretches cause intense pain or feel ‘off’, stop immediately.
- Don’t use your foam roller on joints, on injuries like open wounds or fractures, or anywhere you’ve had recent surgery.
- When using your foam roller on painfully ‘tight’ spots, pause and breathe in and out slowly, focusing on your breathing. Hold for 10-15 seconds and then release slowly.
- It’s not always the point of pain that is the problem area, so using the foam roller directly on the trouble spot might not always ‘fix’ it. For instance, if you have lower back pain, it might be caused by muscle spasms in your glutes or hips. Using a foam roller on the surrounding muscles can give you more relief.
1. Mid-Upper Back Release
When we hunch over our screens and spend all day at our desks, the middle and upper back can get very ‘tight’. Additionally, lower back pain can radiate up into the spine too, causing discomfort and pain. This stretch helps open up your back and chest.

- Lay down on your back and slide the roller under your middle back, just under your shoulder blades. Bend your knees and place your hands behind your head to support your neck.
- Lean back into the roller and raise your hips a bit.
- Walk your feet forward and back, allowing your back to press into the roller for support.
- Hold for 20 seconds on all trigger points.
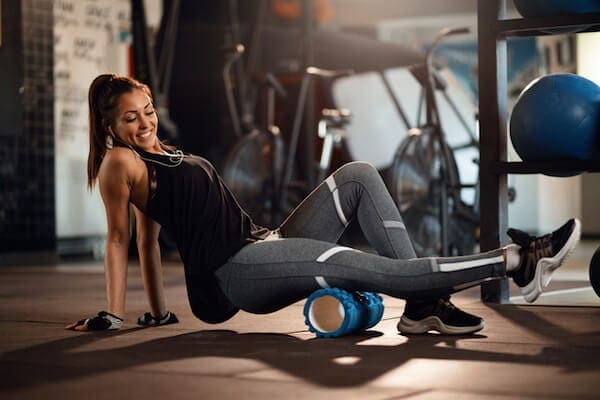
2. Glutes Release
Tension in your glutes can be one of the contributing factors in the lower back. Additionally, your piriformis muscle, which lies deep inside your glutes can be a major pain point for lower back pain. This stretch helps to release tension, but you’ll also have to work on glute-strengthening exercises to reduce the pain.
- Sit on your roller with your feet flat on your floor, using your palms to support yourself.
- Bend your right knee and place your right ankle on your left knee.
- Bring your left knee towards your chest, but keep your spine straight. Don’t lean forward to meet your knee.
- Lean left to put more weight on your left glute, and roll gently till you find a tight spot. Hold for 20 seconds, breathing slowly and keeping your body relaxed.
- Repeat on the other side.
3. Quadricep Release
When the quadriceps get tight, your pelvis can tilt forward, which in turn pulls your spine into an anterior pelvic tilt position, causing compression in your lower back. This stretch helps to release and lengthen your quads.
- Stretch out as if getting into a plank position and slide the roller just above your knees.
- Support yourself on your elbows and toes, taking care not to let your lower back flop down.
- Roll from your knees to mid-thigh and then back again. Hold at the tightest spots. Repeat 5 times.
4. Chest and Shoulder Stretch
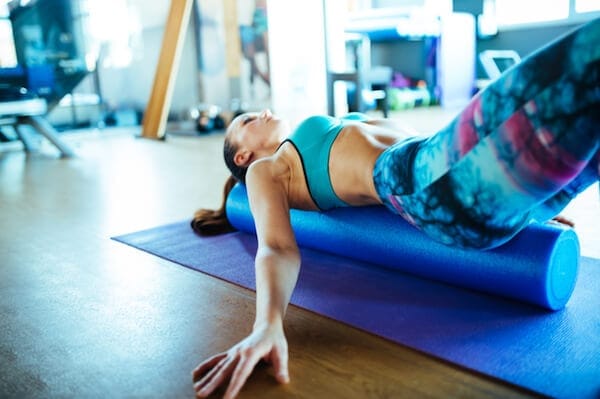
If you work at a desk or counter all day, your chest and shoulders can get rounded, causing shoulder and neck pain. This roller exercise opens up your chest nicely and releases your shoulder muscles too. NOTE: This only works with a foam roller that is long enough to support you from your head to your buttocks.

- Lie on your back with the roller along your spine.
- Plant your feet firmly on the floor, knees bent and shoulder-width apart. This will prevent the foam roller from rolling.
- Place your arms along your body, palms facing up.
- Slowly move your arms up over your head, keeping your fingers grazing the floor lightly, as if you’re making a snow angel.
- Stop when your arms are over your head and breathe deep to deepen the release.
- Bring your arms back and repeat.
If moving your arms is difficult, it might mean your muscles need to get used to it. Instead, place your arms in the cactus pose – i.e: arms in line with your shoulders, elbows bent at 90 degrees, palms facing upwards. You should feel a stretch here, even If you can’t keep your elbows on the ground for long.
5. Hamstring Stretch
Tight hamstrings are one of the biggest culprits when it comes to back pain. This stretch helps to release and lengthen the muscle, which reduces the pressure on your back.

- Sit with your right leg extended in front of you and your left knee bent.
- Place your left foot on the floor close to your body, and slide the foam roller under your thigh, just below your glute.
- Roll backward and forward along the muscle, stopping and holding if you feel a trigger point.
After your foam rolling roller exercises, drink lots of water to re-hydrate. You can expect to feel some soreness by the end of the day or even the next day.
NOTE: You should always get back pain diagnosed by a physiotherapist before attempting to treat it. The roller exercises recommended here are simple exercises that you can do at home, but are no substitute for healthcare advice.
Leave a Reply
You must be logged in to post a comment.


Can’t wait to start doing these exercises. Hoping they’ll fix my tight back.
Hello Benjamin,
So happy to hear from you.
That’s great! We are so glad that you are willing to try these for your back issues. Let us know how’s it going for you…